
Add a picture from a file
A picture is an item like any other. Press Ctrl+Shift+I or click Picture, choose a PNG, JPG or WebP up to 25 MB, and it appears as a new item below the selected one — with a caption box underneath.
Choose the picture
Select the item the picture should follow, then use the toolbar. A standard file dialog opens; pick one image file.
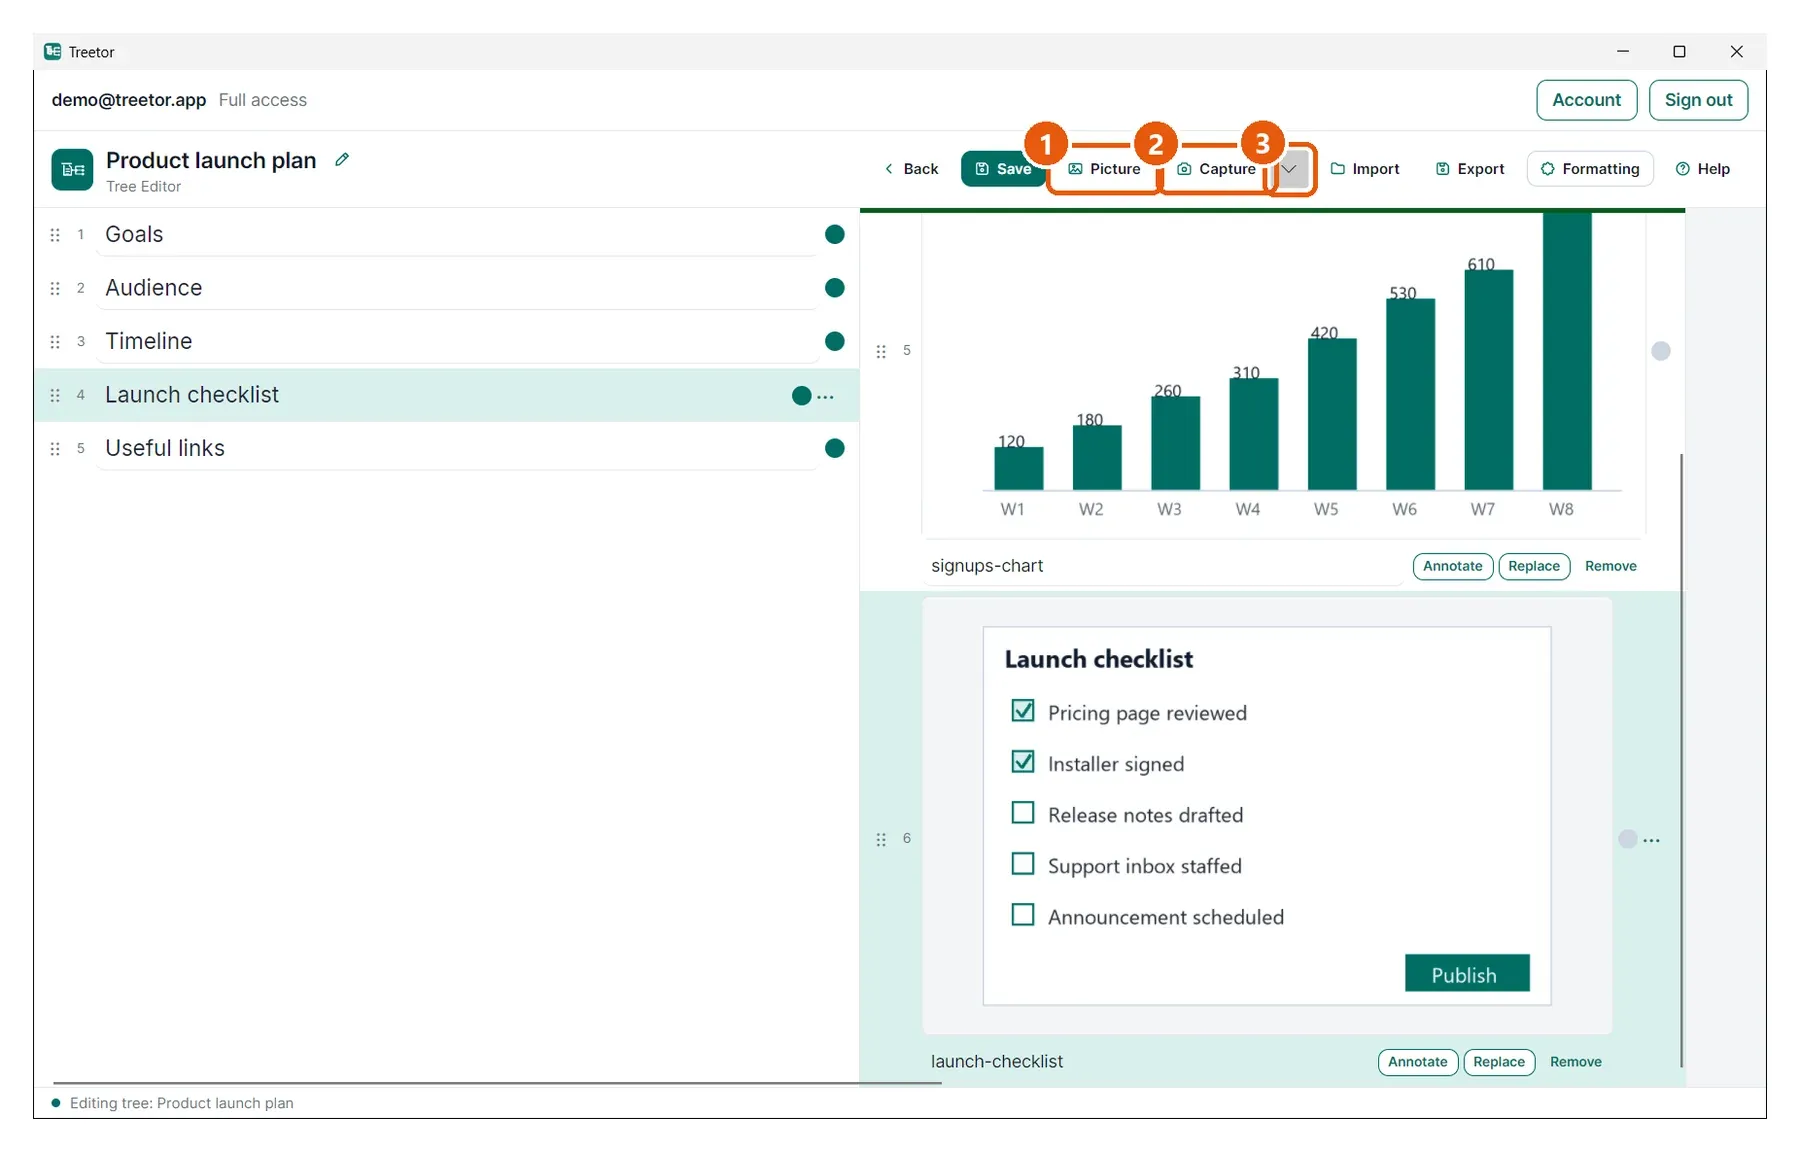
- Picture — opens the file dialog (Ctrl+Shift+I). Accepted: .png, .jpg, .jpeg, .webp, up to 25 MB.
- Capture — the other way to get a picture: grab it from your screen (next guides).
- Capture menu — chooses between a screen region and the full screen.
The picture item
Treetor copies the file into the tree's own media folder, so the original can move or disappear without affecting your notes.
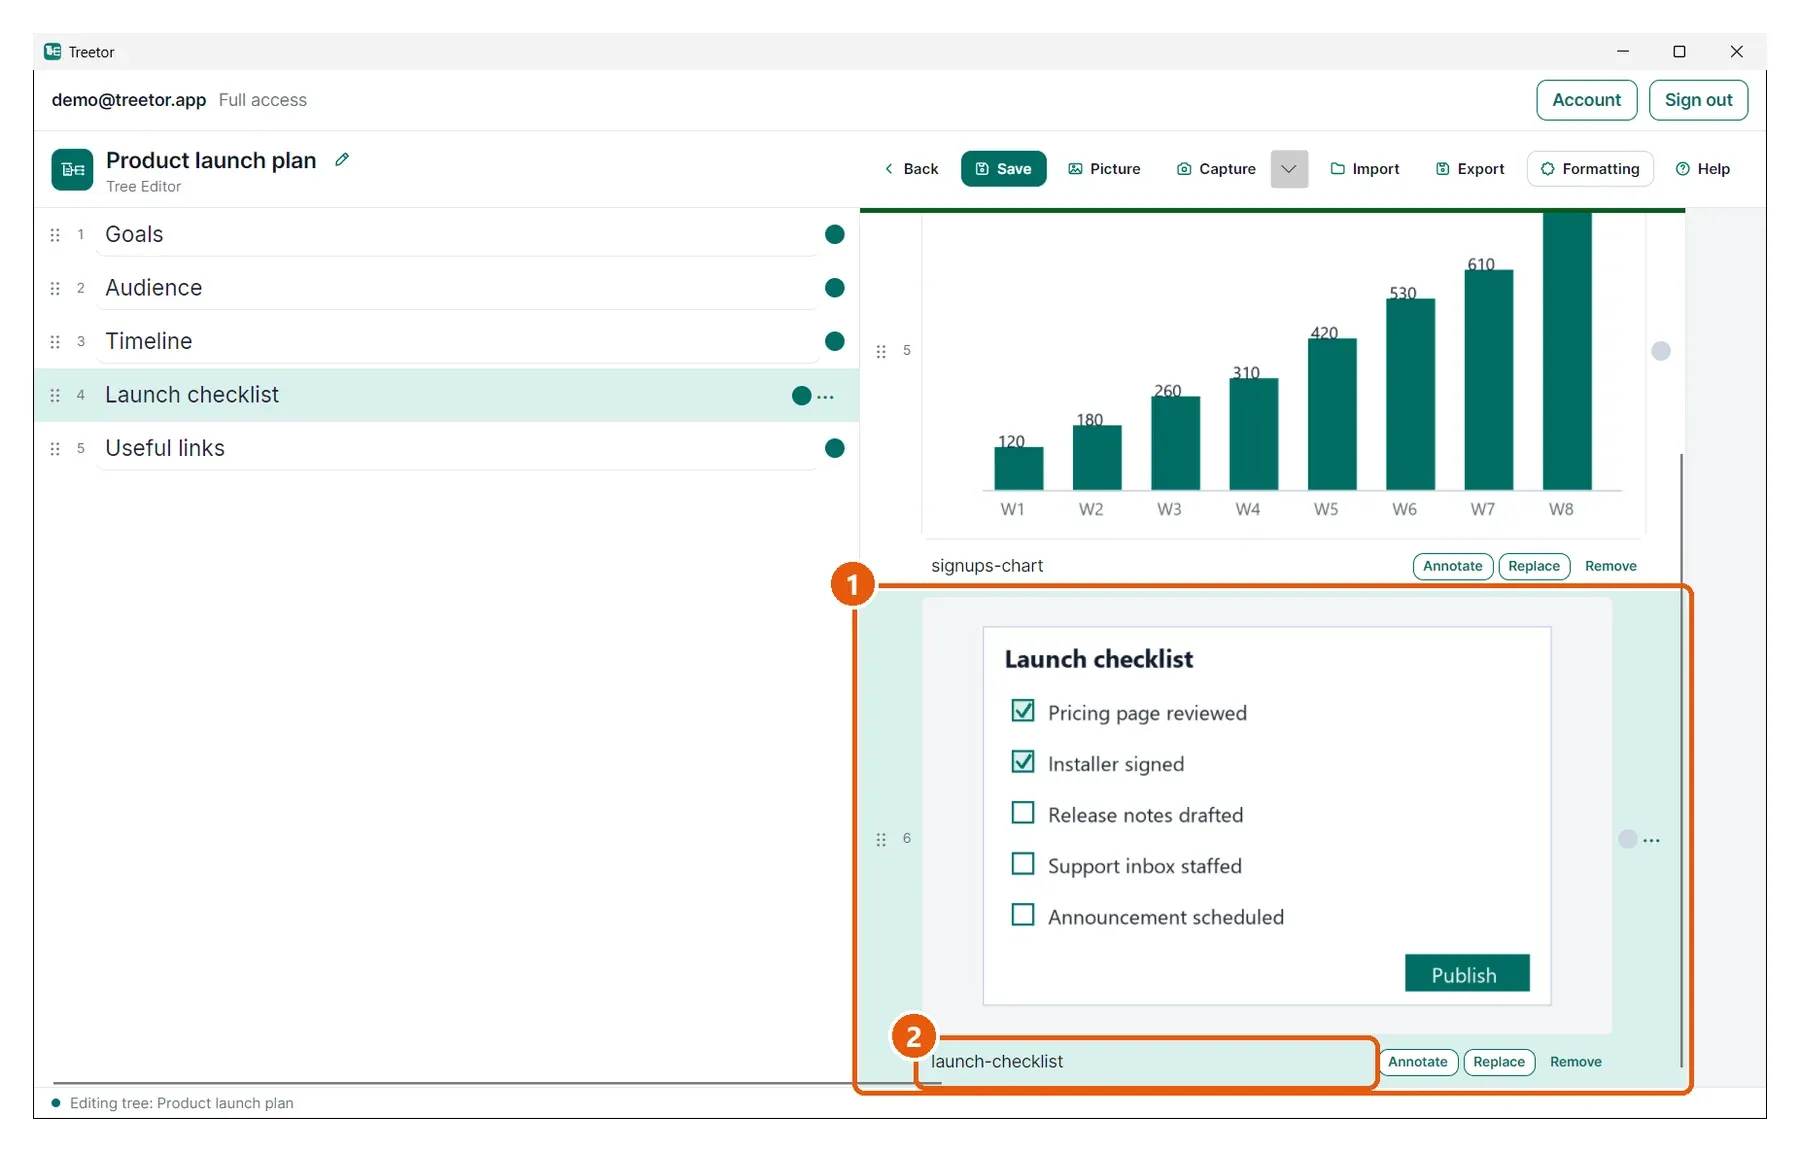
- Picture item — the image at full column width, with the grip, number, state dot and ⋯ button of any item.
- Caption — a text box under the picture. Treetor fills it with the file name; replace it with a caption. It doubles as alt text when you export.