
Editor layout
Where everything lives in the Treetor Tree Editor: the header toolbar, the columns that show each level of your tree, and the green bar that marks the column you are working in.
The Tree Editor at a glance
Treetor shows one column per level of your tree, side by side. You always work in one column at a time; the column to its right previews what is underneath the selected item.
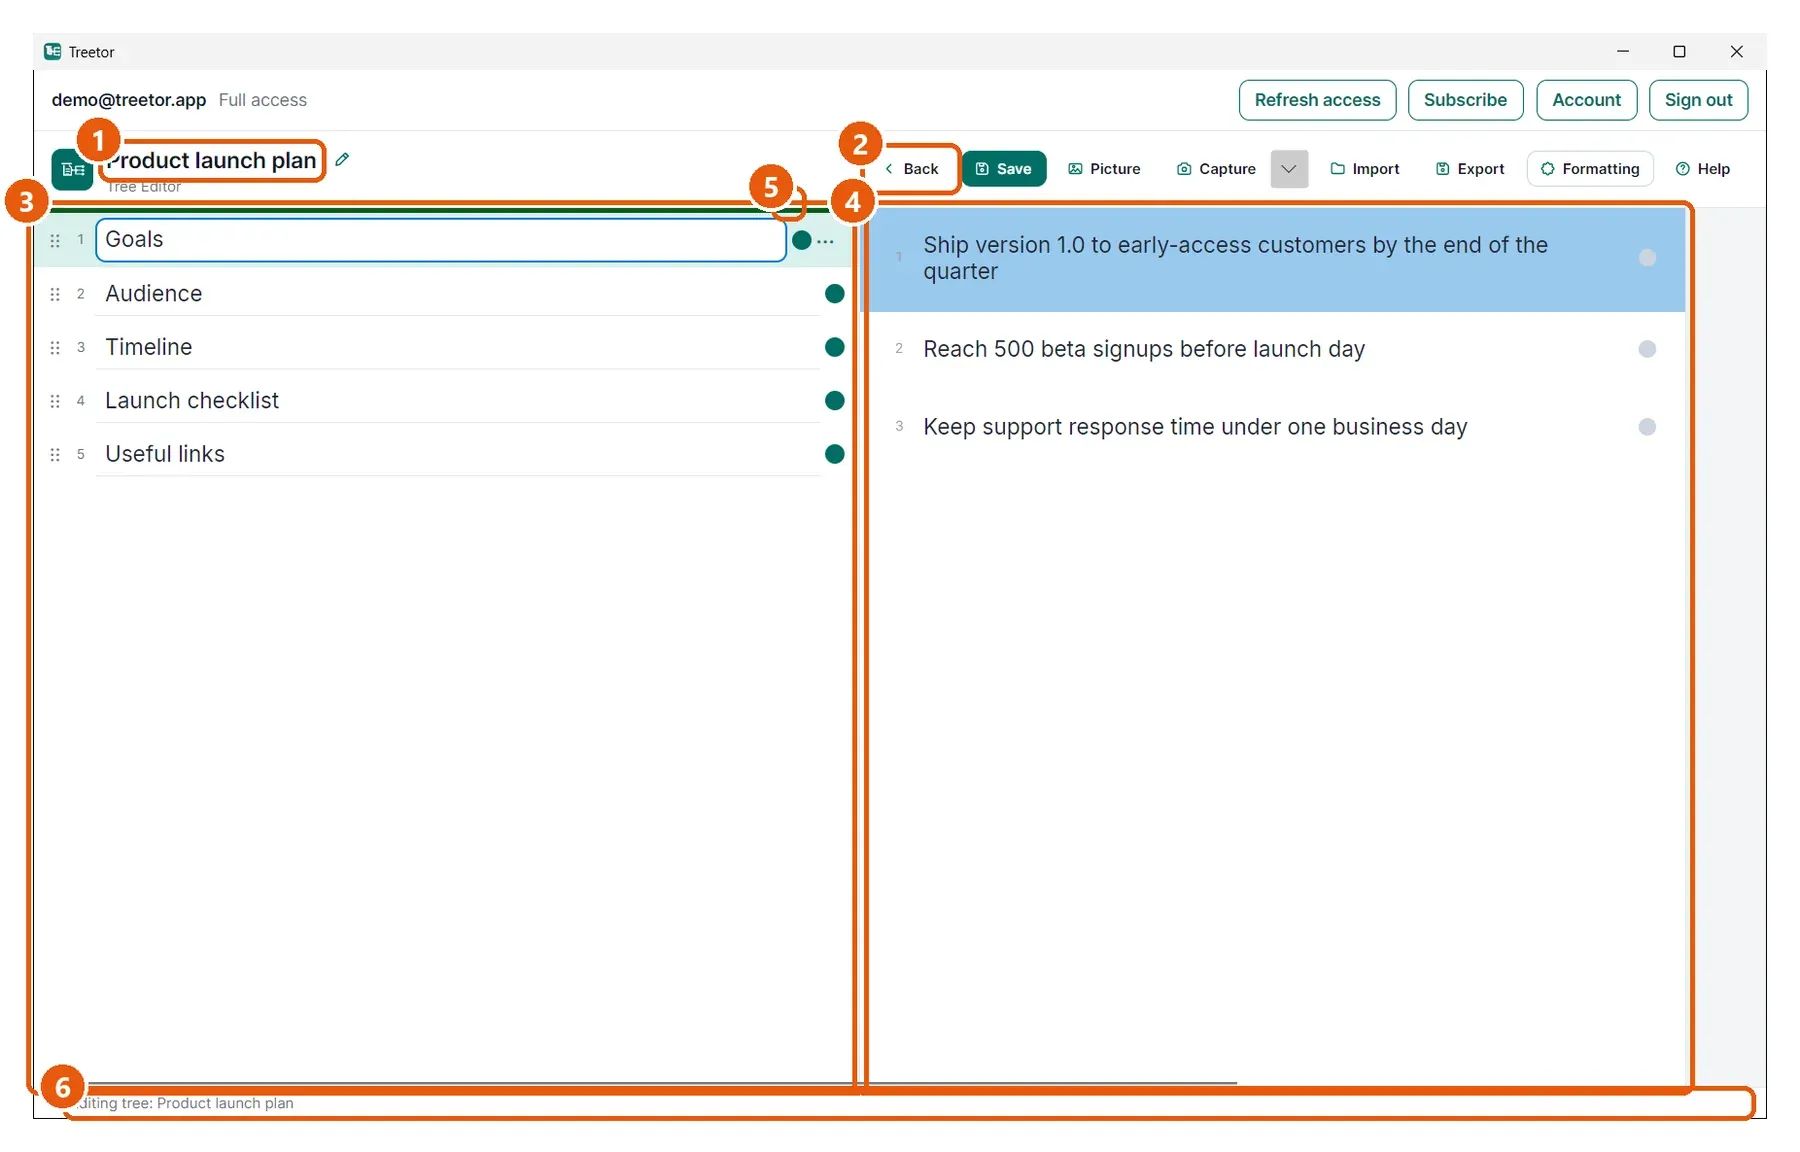
- Tree title — the tree you are editing. The pencil next to it opens the Tree Info dialog.
- Header toolbar — Back, Save, Picture, Capture, Import, Export, Formatting and Help. Each button has its own guide.
- Active column — the green bar at the top marks the column that receives your typing and keyboard shortcuts. Here it is the root column, the top level of the tree.
- Preview column — the children of the item selected in the active column, so you can see one level deeper without leaving your place. Ctrl+→ moves the green bar into it; Ctrl+← brings it back.
- State dot — teal means the item has children; gray means it is a leaf. An empty preview column reads No child items.
- Status bar — which tree is open and, while saving, the save state.