
Annotation editor tour
The annotation editor opens for every capture and every picture you choose to annotate. One toolbar holds the drawing tools; the bar underneath picks the preset; Insert puts the result back into your tree.
The toolbar, left to right
Tools are grouped. Pick a tool, then drag on the picture; the Pointer selects and moves what you drew.
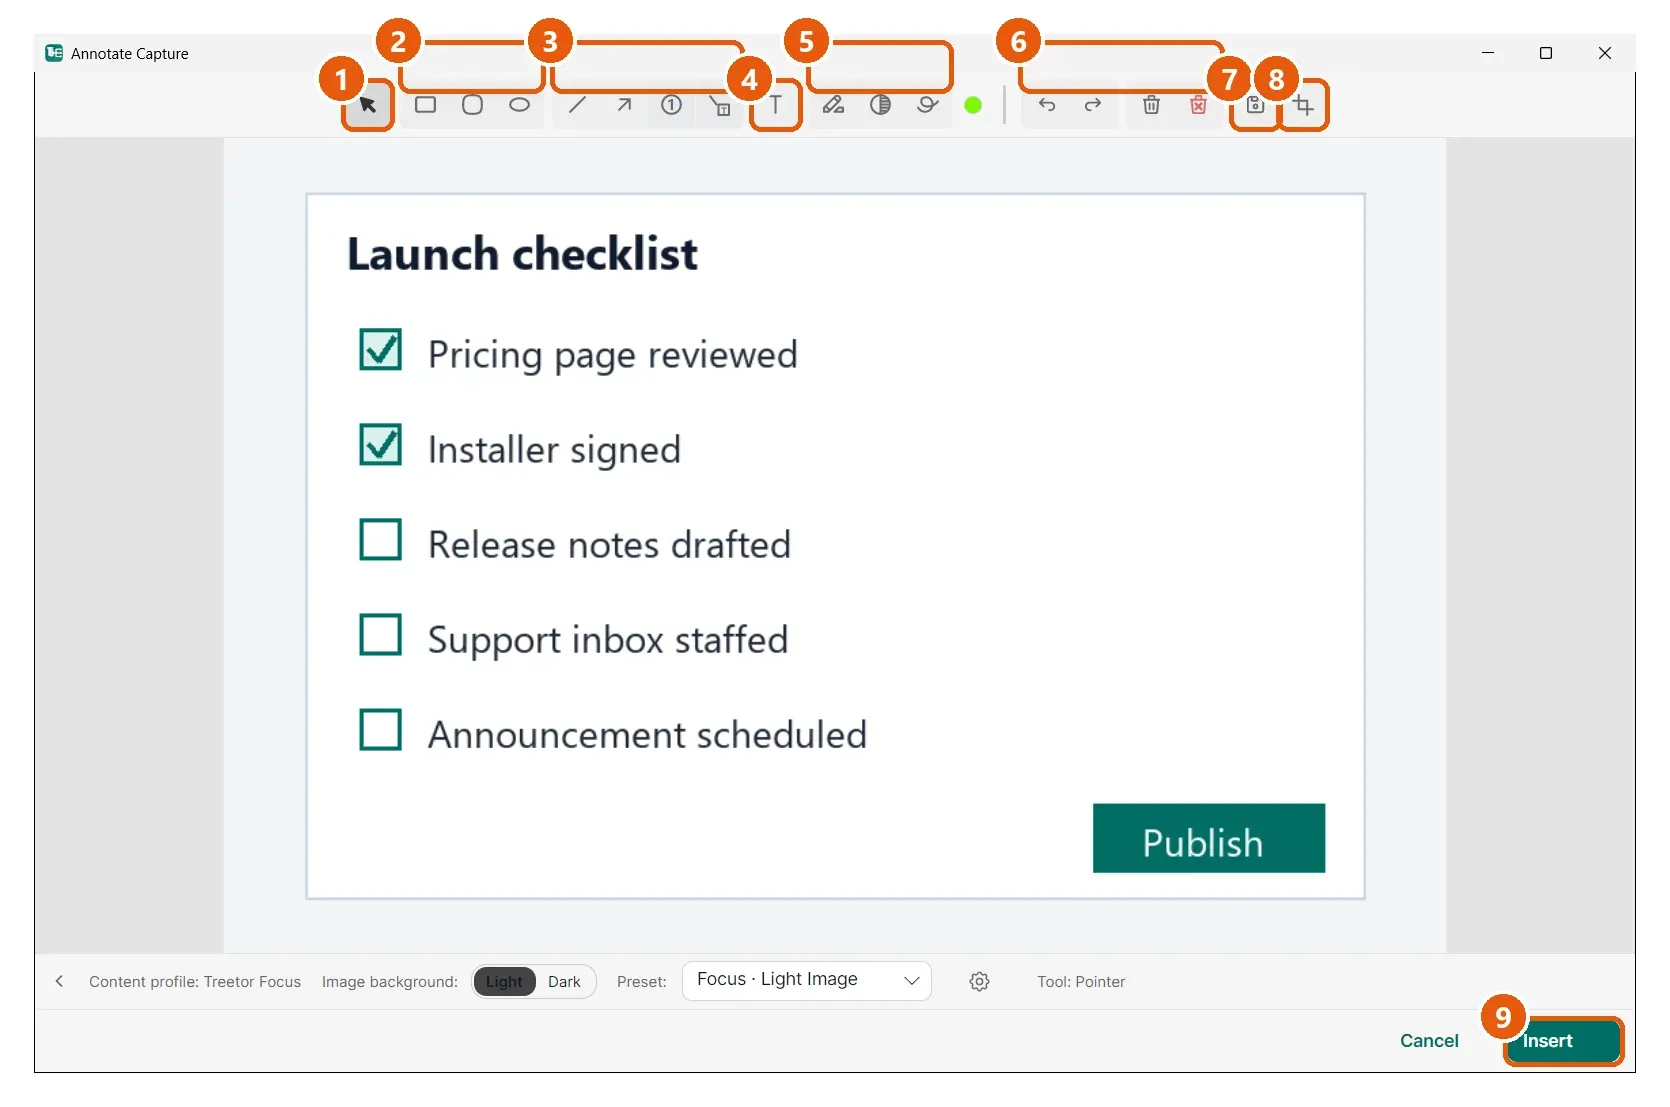
- Pointer — select, move and resize annotations. The editor starts here.
- Shapes — Rectangle, Rounded Rectangle, Ellipse. Drag to draw.
- Lines — Line, Arrow, Number (a numbered callout badge with a leader line) and Text Line (a label with a leader line).
- Text — click to place a text box, then type.
- Effects — Highlighter, Blur/Redact for anything private, and Freehand drawing. The colour dot next to them shows the current tool's stroke colour.
- Undo / Redo and Delete — Ctrl+Z, Ctrl+Y; then Delete Selected (Del) and Delete All, which clears every annotation.
- Export Flattened PNG… — save a copy of the picture with the annotations baked in, for use outside Treetor.
- Crop — drag a rectangle to keep only part of the picture.
- Insert — save the annotated picture into the tree (Ctrl+S). Cancel, next to it, closes without changing the item.