
Screen capture
Capture grabs part of your screen — or all of it — straight into a new picture item and opens it for annotation. It is the fastest way to document anything you can see.
Region or full screen
Select the item the capture should follow. The Capture button grabs a region; the arrow next to it offers both modes.
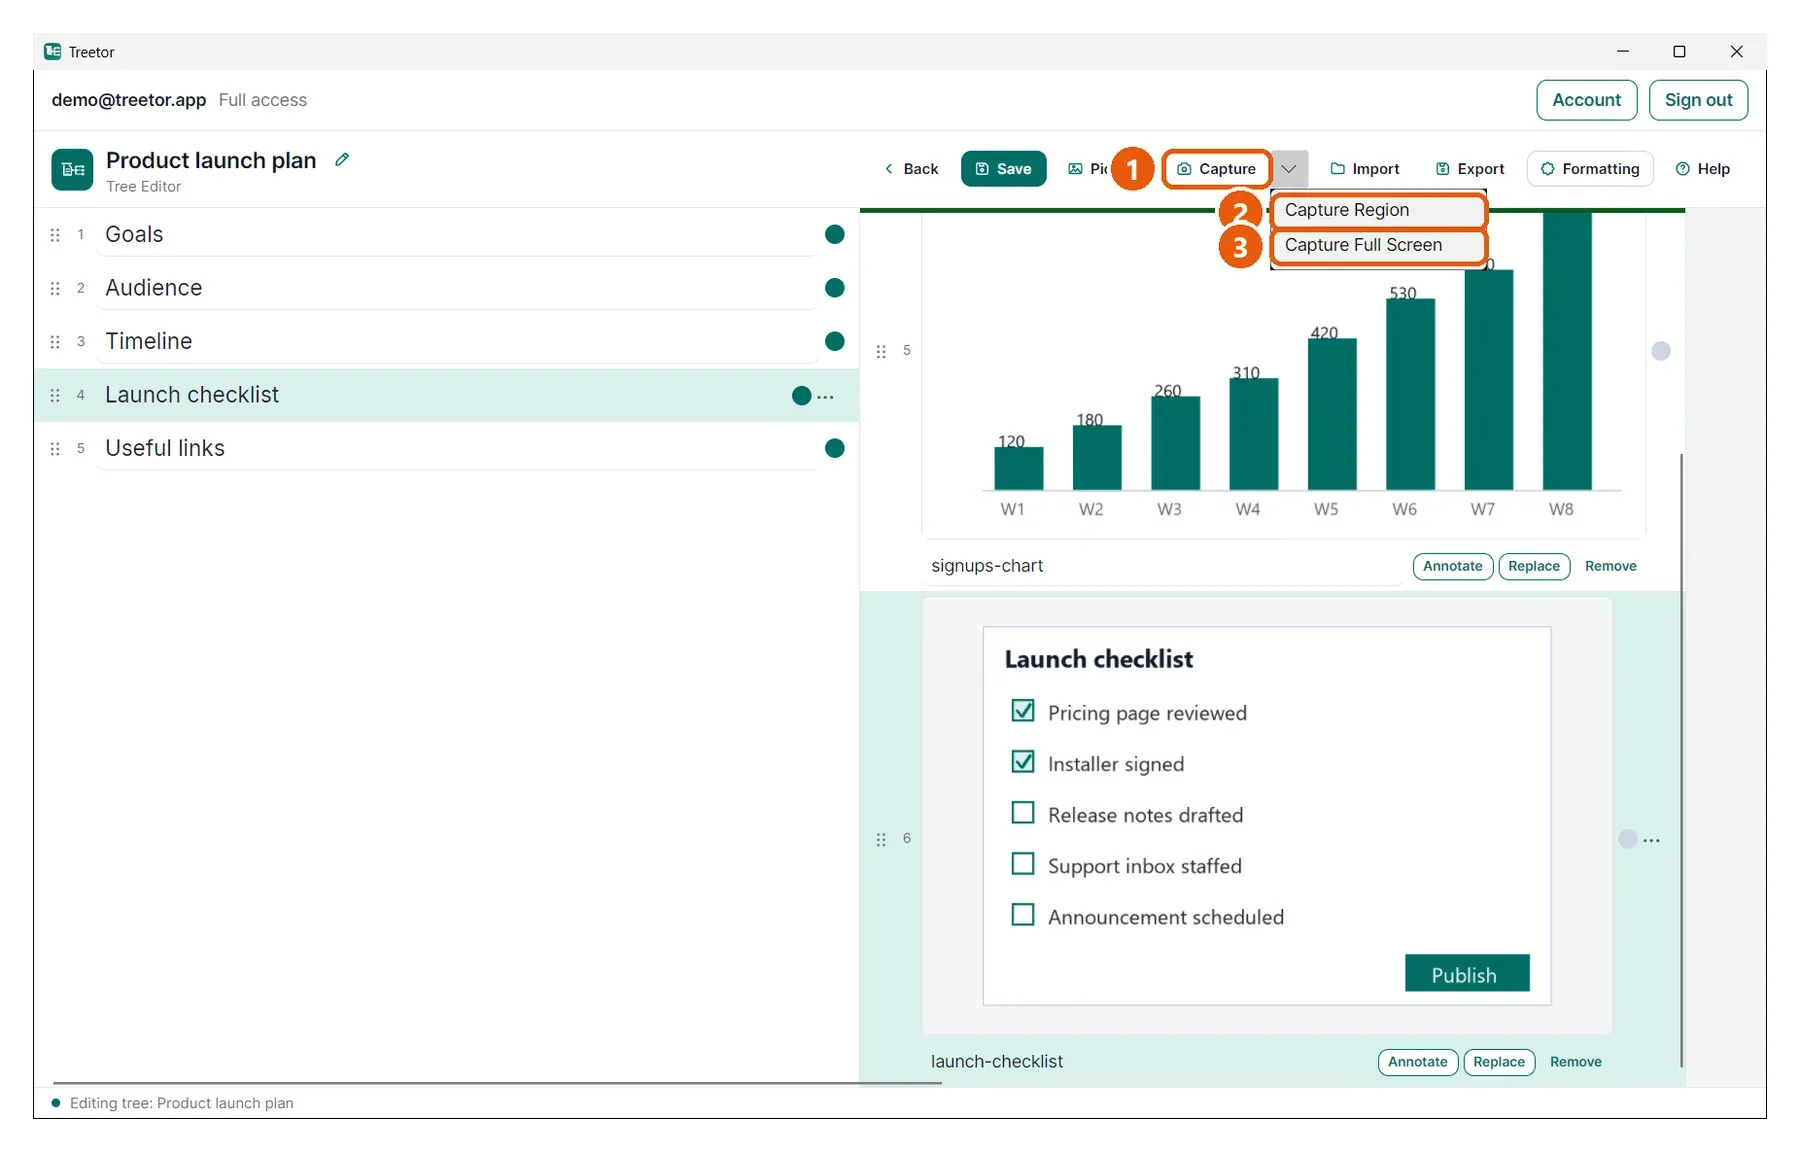
- Capture — starts a region capture (Ctrl+Shift+C). Treetor's window steps aside so you can see what is behind it.
- Capture Region — the same as the button.
- Capture Full Screen — takes the whole screen at once, no selection needed.
Select the region
Your screen dims and the pointer becomes a crosshair. Drag a rectangle around what you want; the area inside stays bright as you drag. Release to capture. Press Esc at any time to cancel and return to Treetor with nothing added.
Annotate and insert
The capture opens in the annotation editor right away. Add callouts, blur anything private, then press Insert — the picture becomes a new item below the one you had selected, with the screen capture as its caption. Cancel discards the capture.
Permissions on macOS
The first time you capture, macOS asks to allow Treetor to record the screen. Open System Settings › Privacy & Security › Screen Recording, switch Treetor on, and start the capture again. Windows and Linux ask nothing.
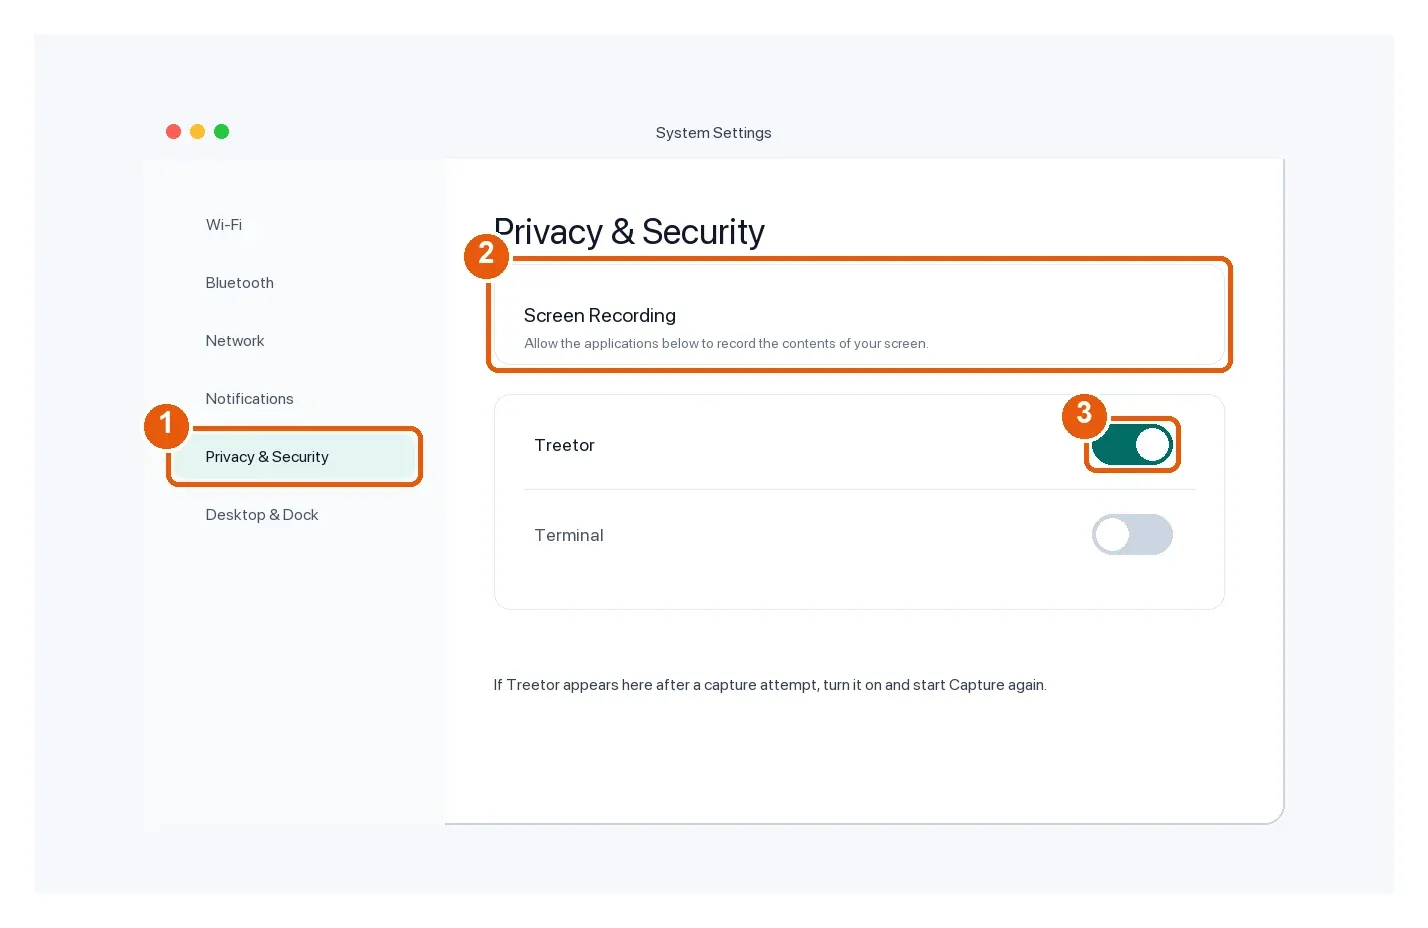
- Privacy & Security — the System Settings area that controls screen access.
- Screen Recording — the permission group Treetor needs for Capture.
- Treetor toggle — turn it on, then retry the capture.