
Create your first tree
A tree starts with a title and an optional note. Treetor creates it with one empty item, opens it in the editor, and you start typing.
Name the tree
Click New Tree in the library toolbar. The New Tree dialog asks for two things; only the title is required.
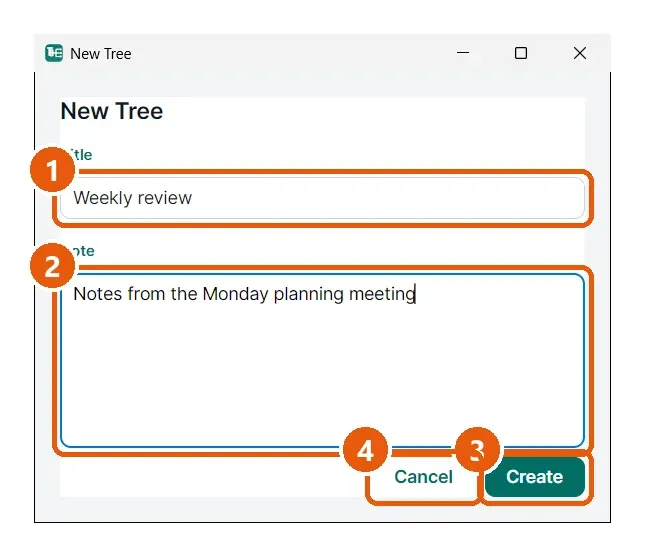
- Title — the name shown on the library card and in the editor header. You can change it later from the editor.
- Note — optional. A sentence about what the tree is for; it appears on the card under the title.
- Create — creates the tree and opens it.
- Cancel — closes the dialog without creating anything.
What a new tree contains
Treetor opens the new tree straight away. It has exactly one item, so you can start typing without clicking anything.
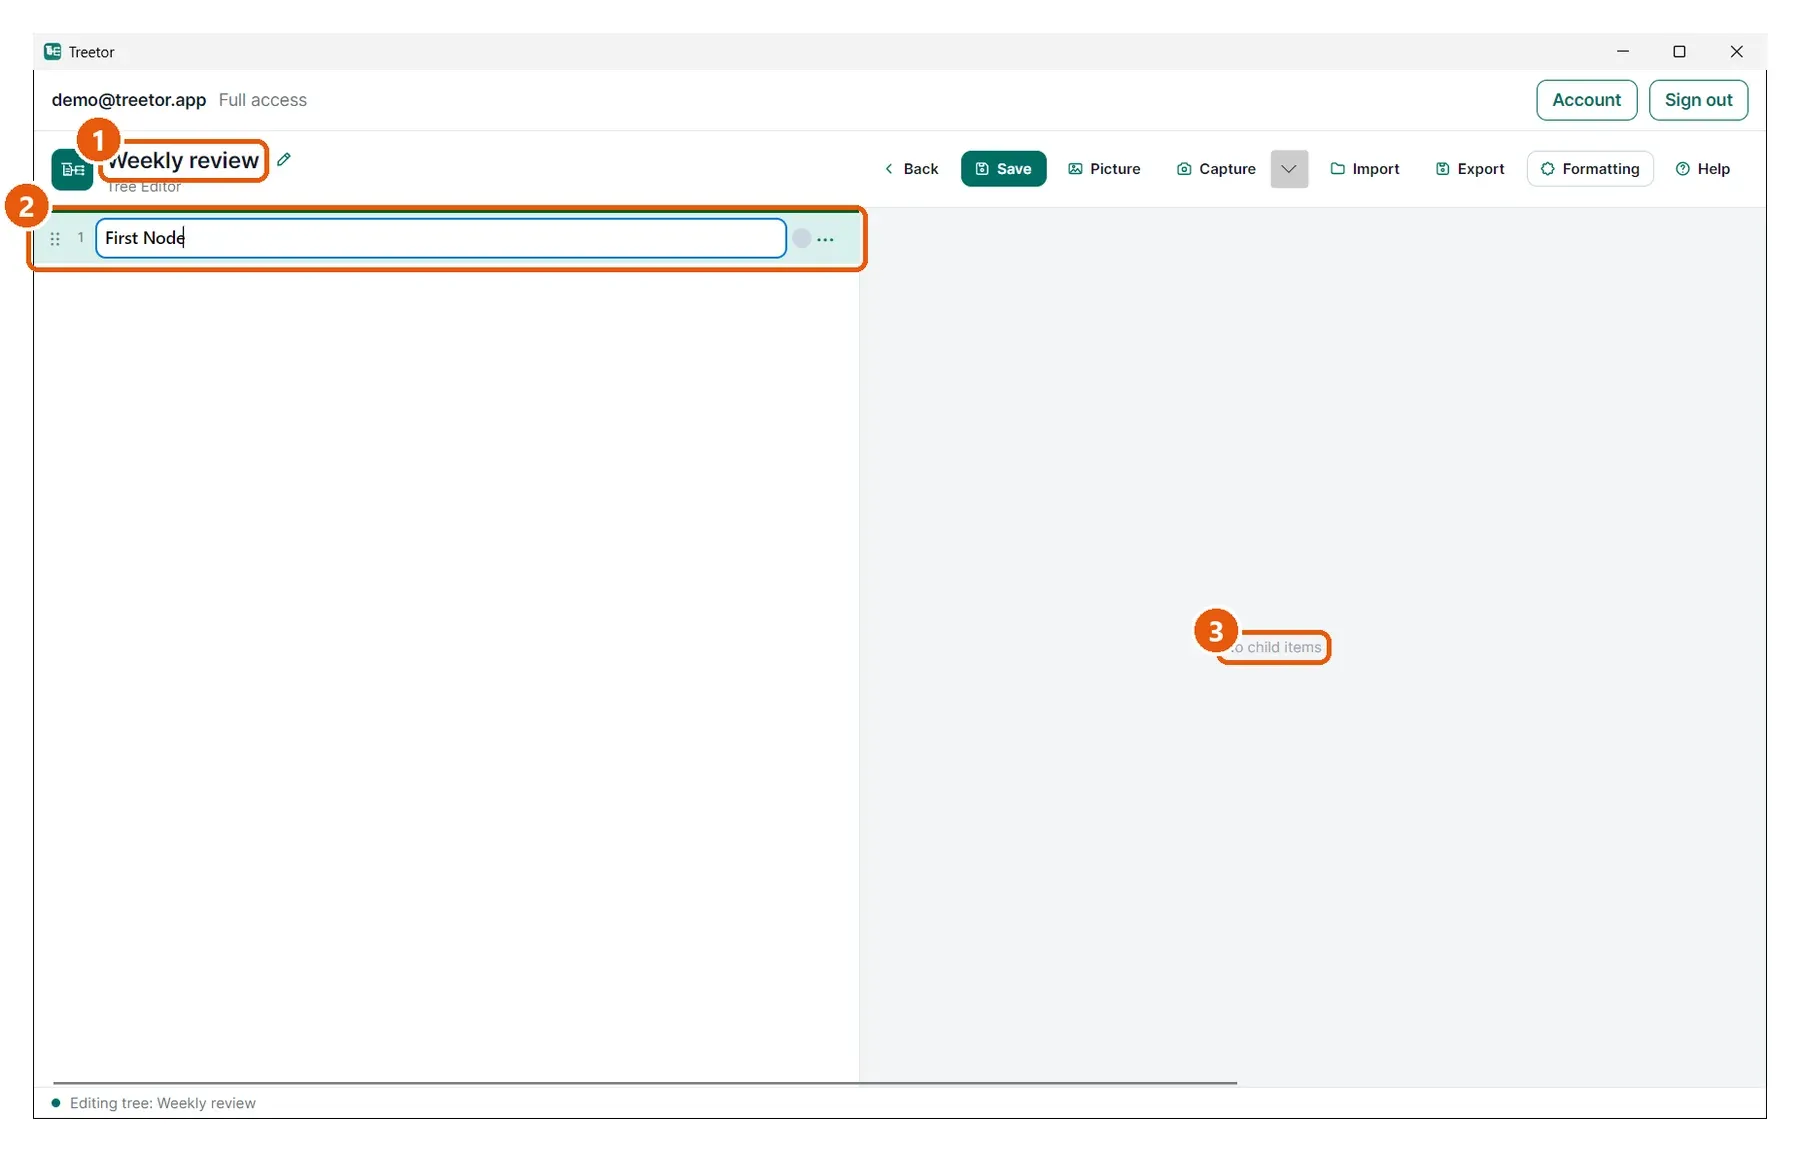
- Tree title — what you typed in the dialog.
- First item — one item in the root column, already selected. Type to give it text; press Ctrl+Enter for the next item.
- No child items — the column to the right stays empty until you add children with Ctrl+→.